Setting Up the Wonderment Delivery Promise on Your Product Page
How to Set Up the Wonderment Delivery Promise on Your Product Page
Setting up the Wonderment Delivery Promise on your product page is a great way to let your customers know when they can expect their orders. Here's a simple guide to help you configure it step by step.
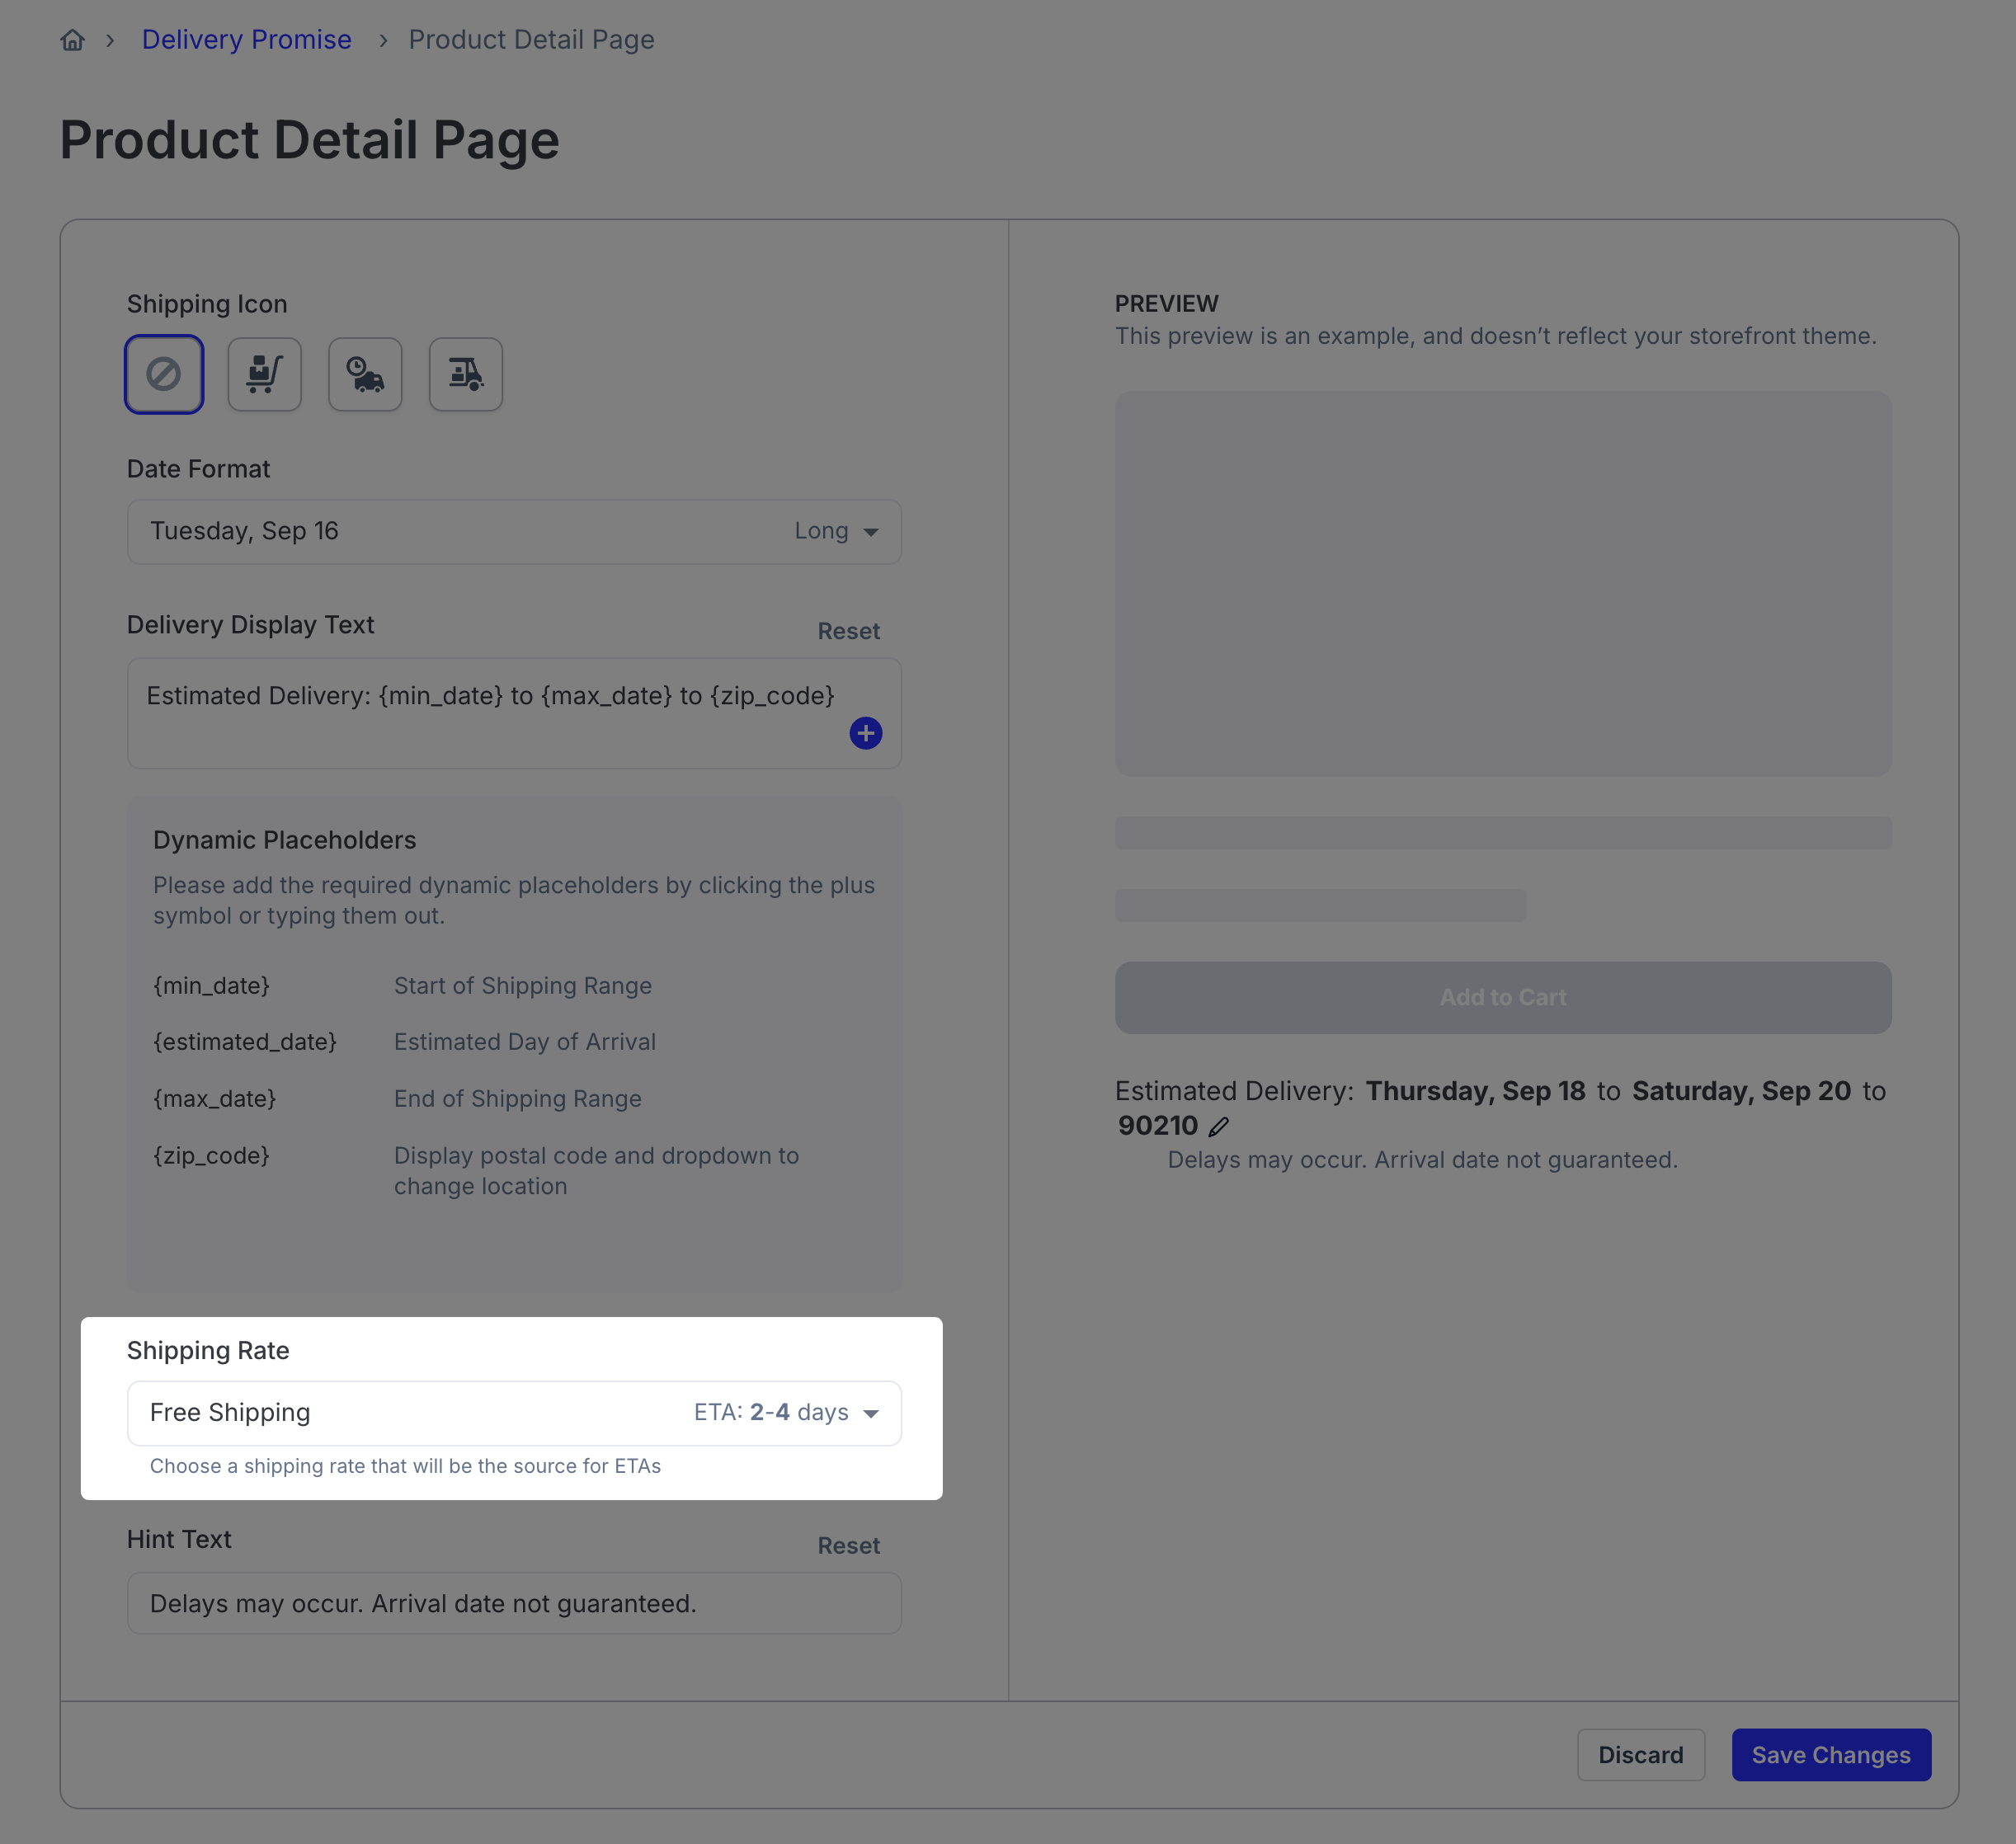
Step 1: Choose Your Icon
First, decide if you want an icon to appear next to the delivery time information. You can either keep it simple with no icon or choose from several options to suit your store's style.
Step 2: Pick the Date Format
Next, select how you'd like the delivery date to be presented. Whether you prefer showing the weekday along with the date or another format, pick the one that best fits your store's vibe.
Step 3: Customize the Text Label
You can personalize the text that describes the delivery date. Use the placeholders available to include the earliest likely delivery date, the latest likely date, and the delivery ZIP code to make the information clear and relevant for your customers.
Step 4: Add a Sub-text Field
Underneath the main delivery information, you have the option to add a sub-text. This is a great space for marketing messages or additional details you want your customers to know about their delivery.
Step 5: Select Shipping Service Level
Choose the default shipping service level for your store. Whether it's the fastest option, the cheapest, or another preference, this setting helps calculate the estimated time of arrival (ETA) for your products and carry customer expectations for speed to your checkout.
Preview and Save
As you configure these options, you'll see a live preview on the right side of the settings. Once you're satisfied with how everything looks, click "save changes."
Adding the Block to Your Product Page
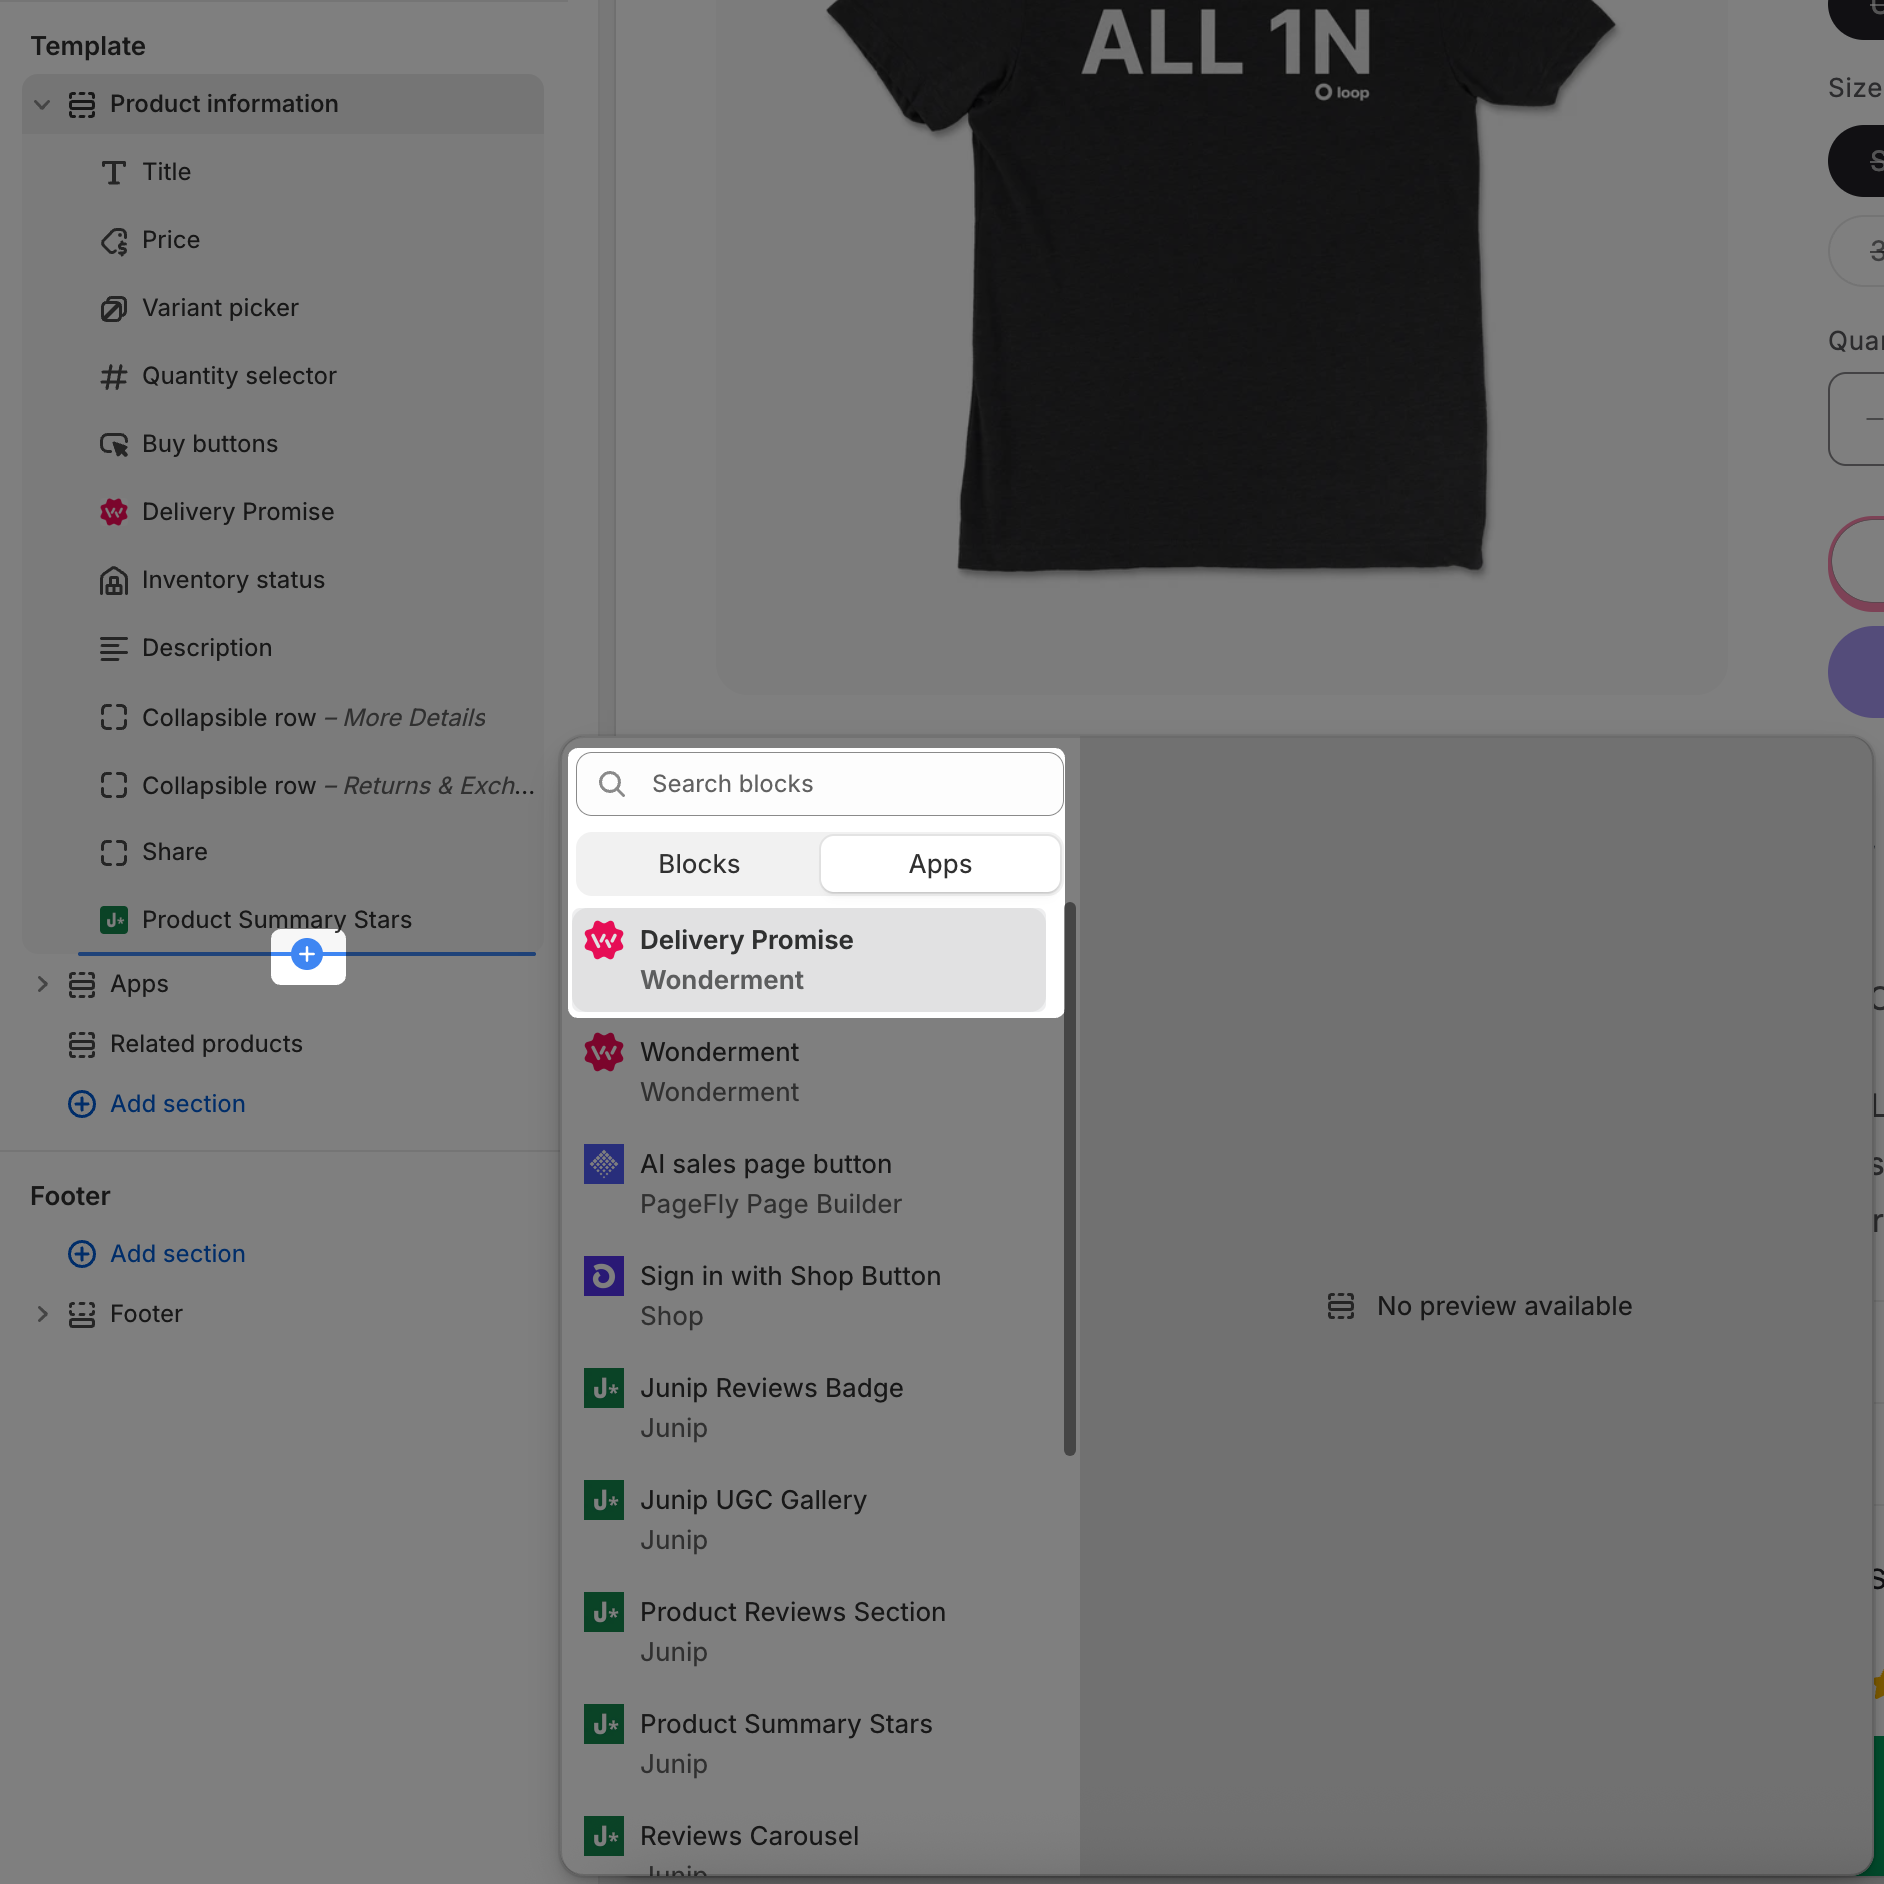
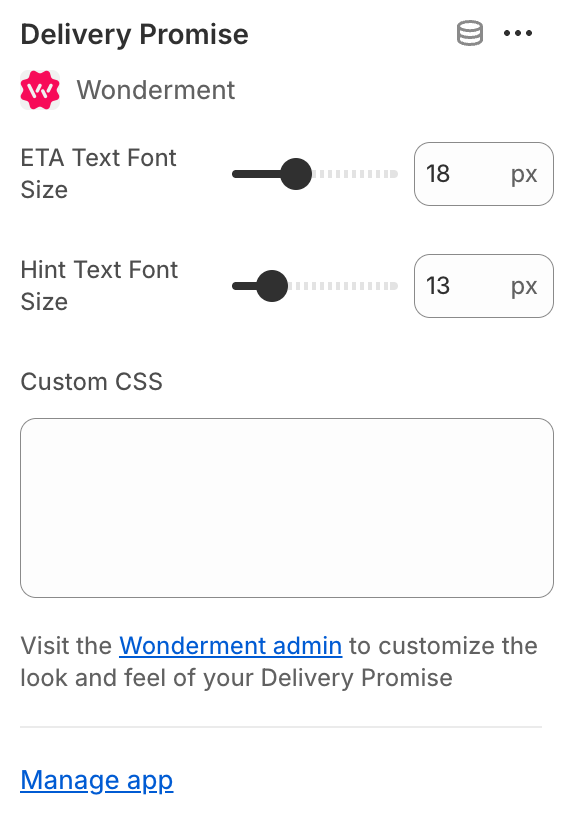
Now, head over to your Product page template in Shopify. Here, you can add the App Block you just configured. In the Shopify theme editor, you'll also have the option to adjust text sizing or add custom CSS to further customize the appearance of the block.
Excluding Products
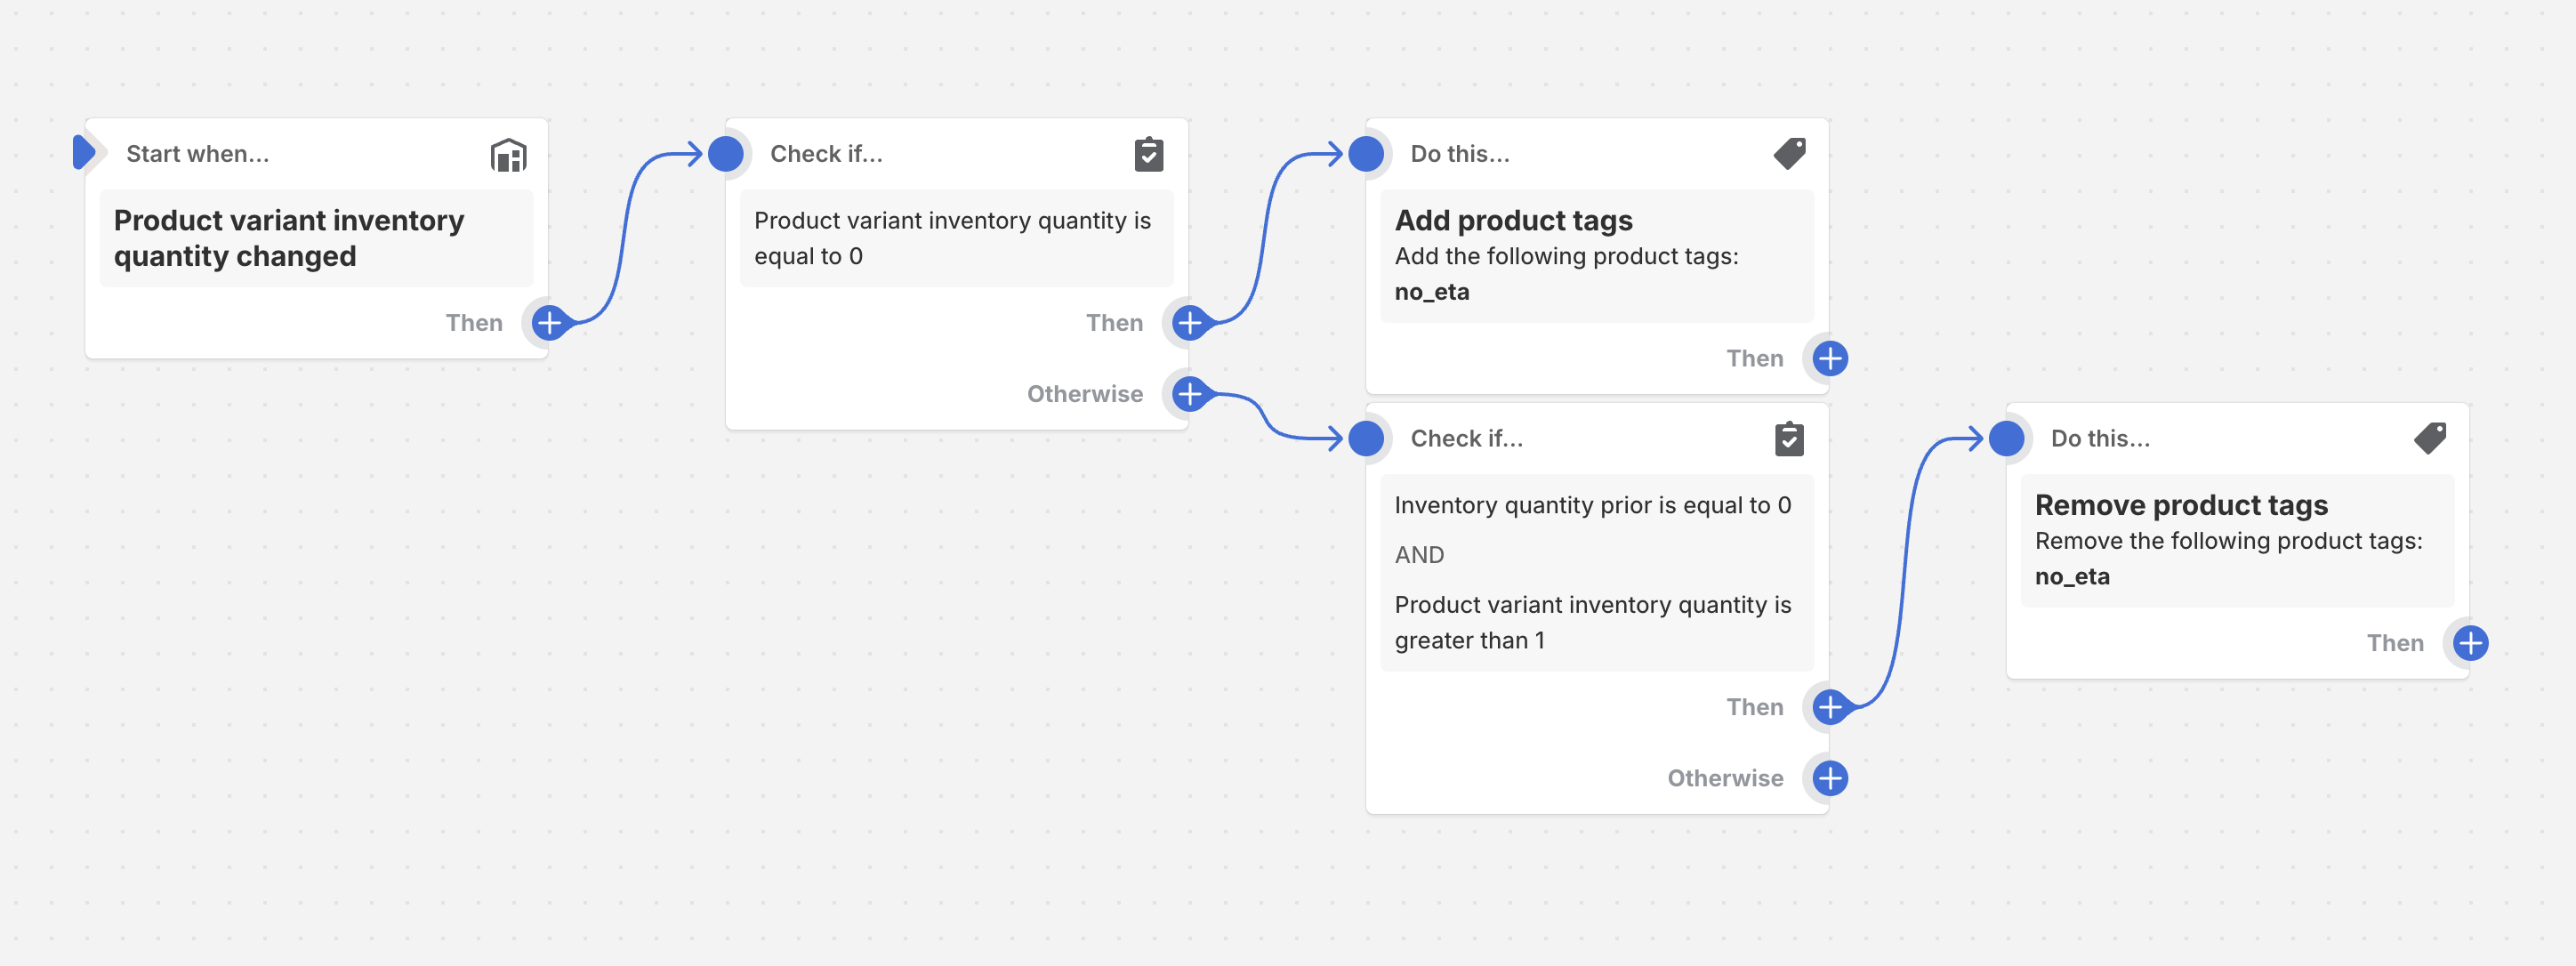
If there are products you don't want to show an ETA for, like pre-sale or back-ordered items, simply add the Shopify tag "hide_eta" to those products. If you're on a Shopify plan with access to Shopify Flow, you can automate this tag being added or removed by including it in an existing inventory-based Flow, or creating a new Flow similar to this example.